Prerequisites / Setup
Open Advantage with the TCP server open. There are 2 possibilities, modify the shortcut used to open Avantage or use the executable with an additional option.
-
Shortcuts
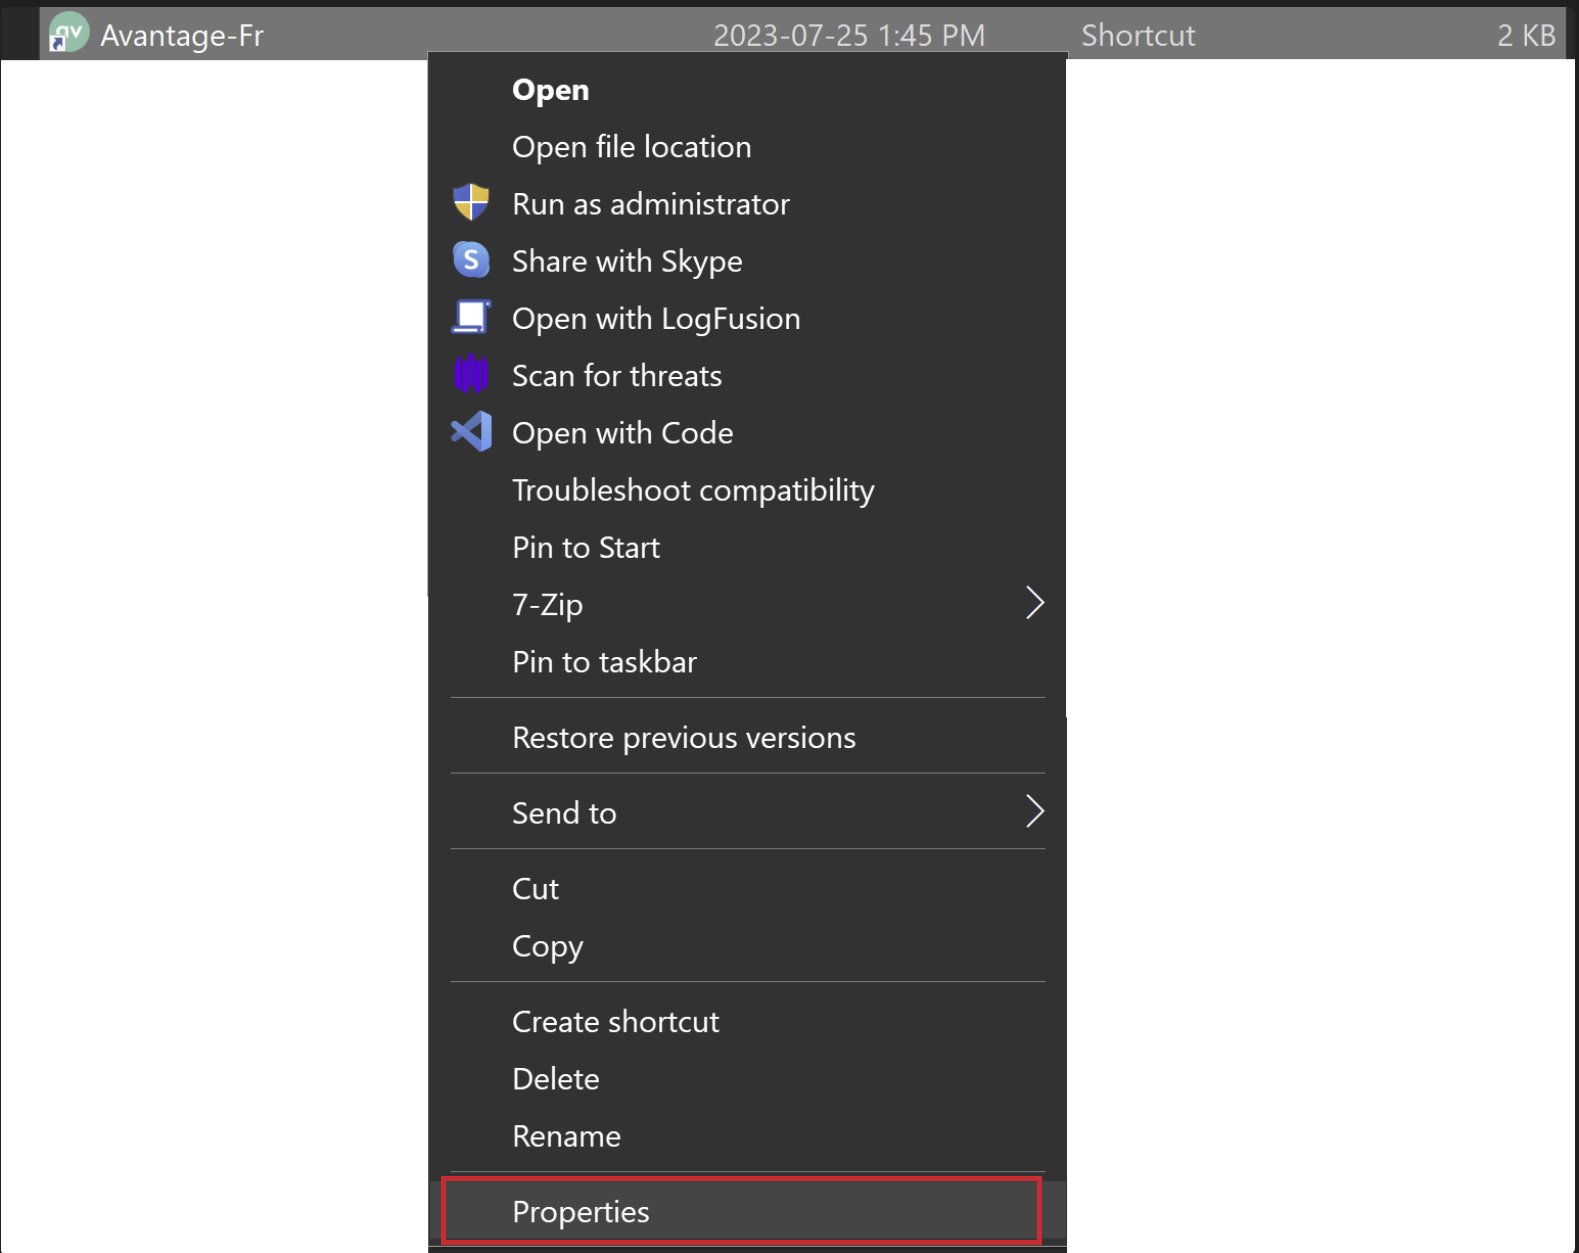
Find the shortcut used to open Advantage. Right click to open the context menu and go to properties (red rectangle).
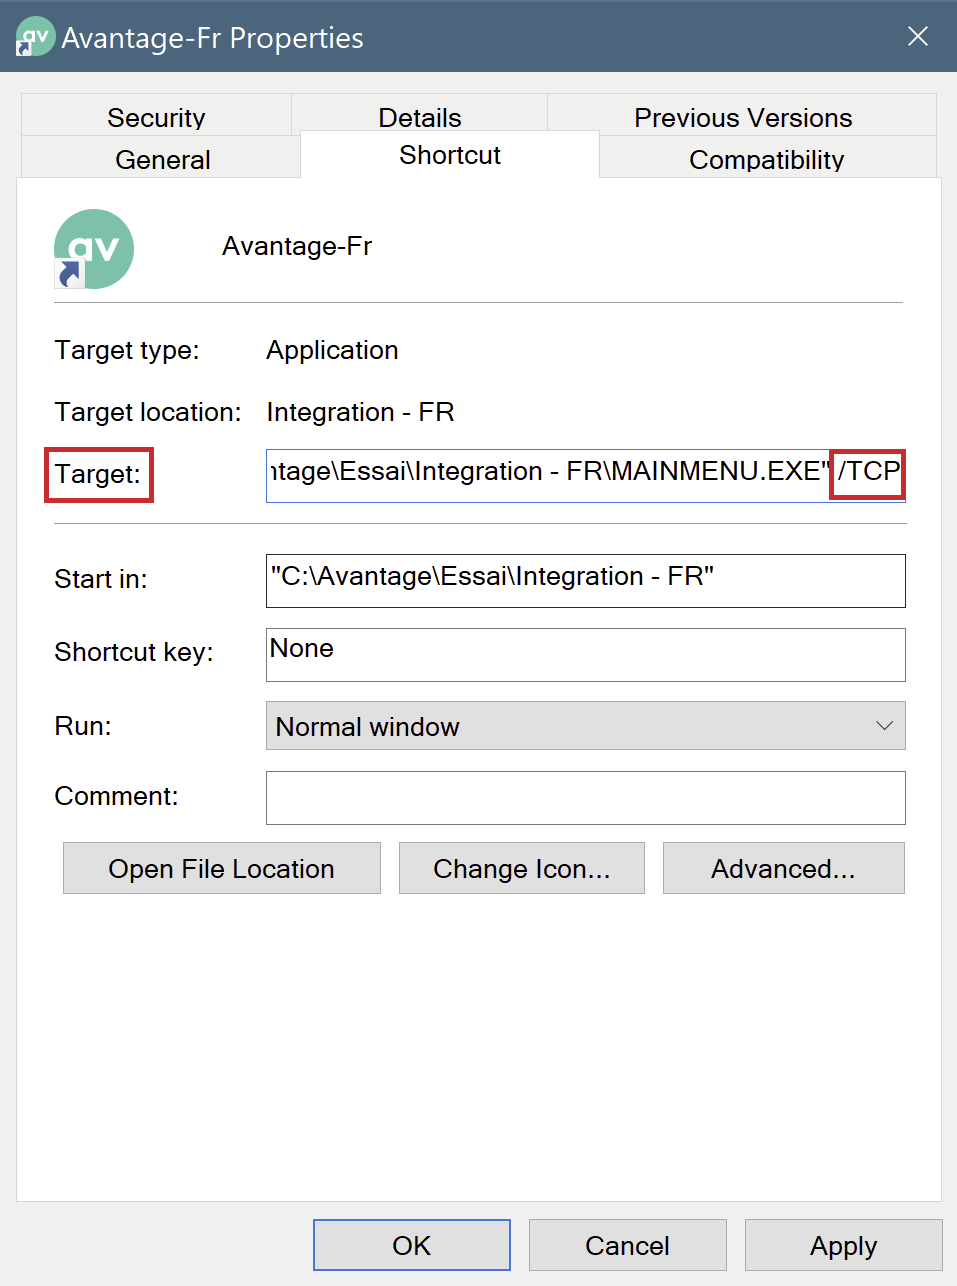
Go to the shortcuts submenu.

Add /TCP to the target/target. For example, if the target was C:\Advantage\MAINMENU.EXE, the target should become C:\Advantage\MAINMENU.EXE /TCP. Click on the Apply button.
-
Command line
If you prefer to use the command line, you must add /TCP at the command to open Avantage. For example, if my normal order is C:\Advantage\MAINMENU.EXE, the new order is C:\Advantage\MAINMENU.EXE /TCP. It is also possible to do the same for an Advantage shortcut. For example, I have a shortcut C:\Users\user\Documents\Avantage\Avantage-Fr.lnk, I can use C:\Users\user\Documents\Avantage\Avantage-Fr.lnk /TCP.
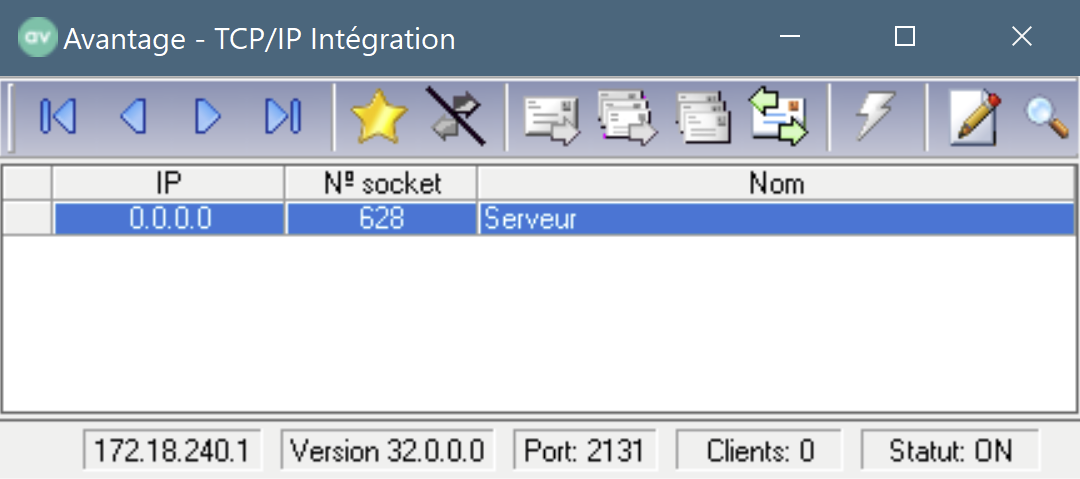
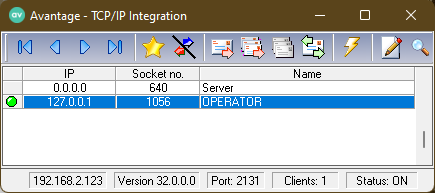
If the TCP server has opened successfully, a new small window should be opened at the same time as the normal application:
Using Elmer.Sync – Advantage Connection
-
Fill in the fields
-
(Optional) Server information
Server information is already populated, but can be changed as needed.-
Address
The Address field should contain the address of the Avatange TCP server. If Avantage is open on the machine using Elmer.Sync, the address remains localhost. Otherwise, you must change to the correct address. -
Port
The port field should contain the port on which the Avantage TCP server is open. You can check the port on the TCP server window. If the port is not the same between Elmer.Sync and the TCP server, you must modify the Port field in Elmer.Sync for that of the TCP server.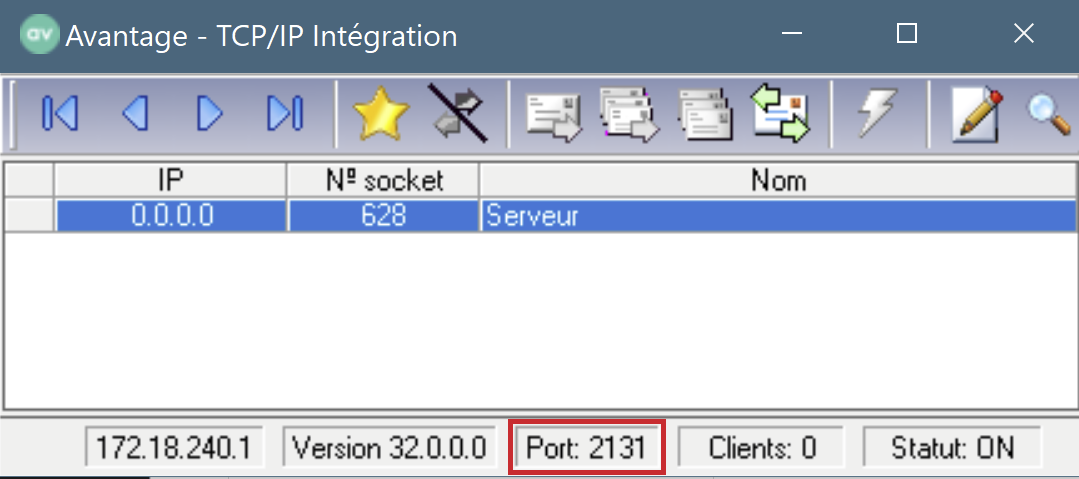
TCP Server Advantage
-
-
Account information
-
Company ID
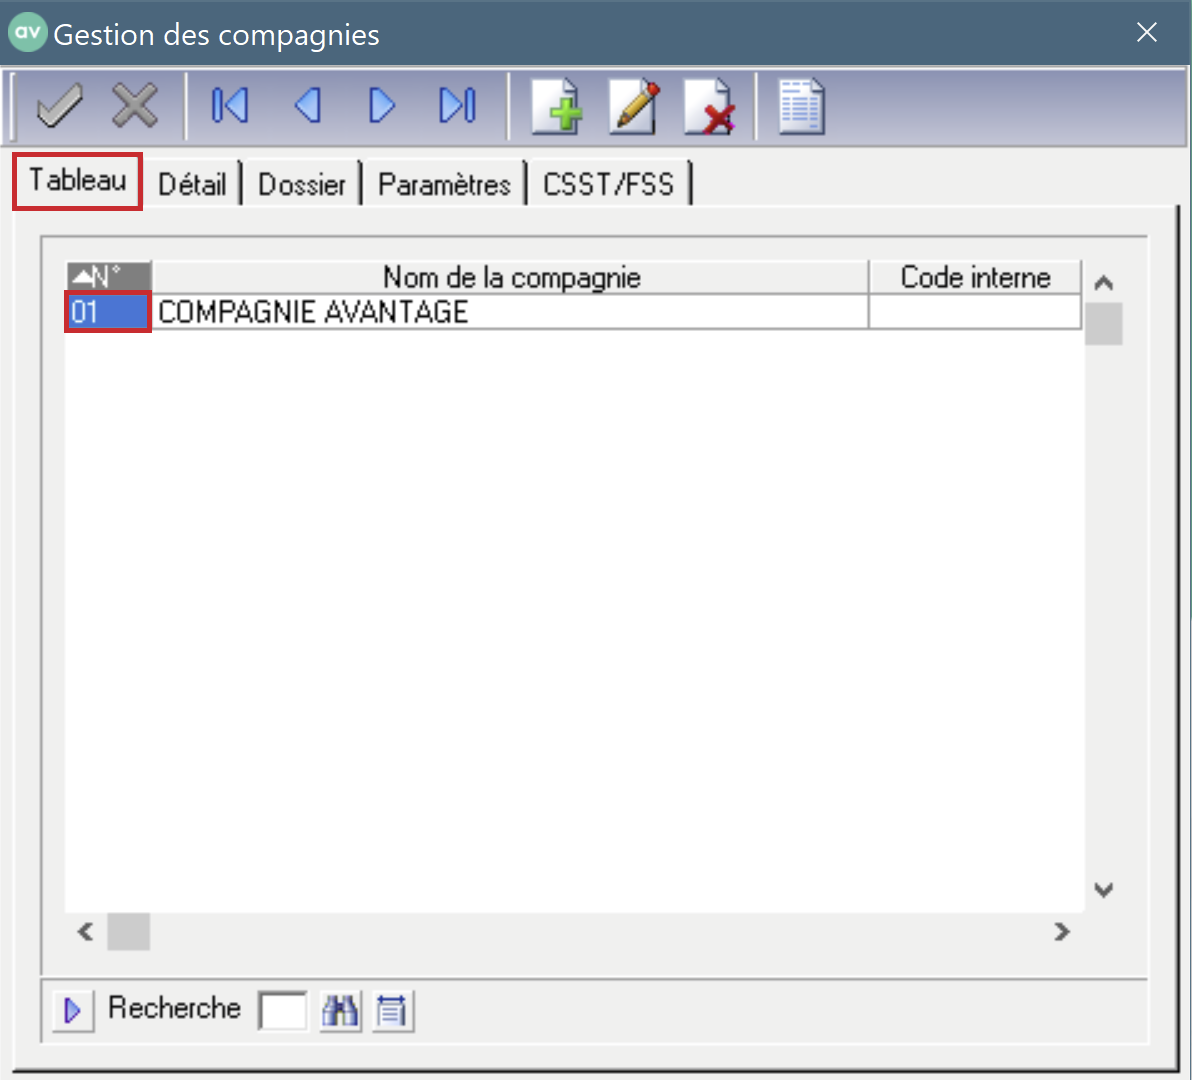
The Company Id field must contain the Advantage company number that will be used for the session. To find the company number in Avantage, you must go to the Operator tab -> Company management.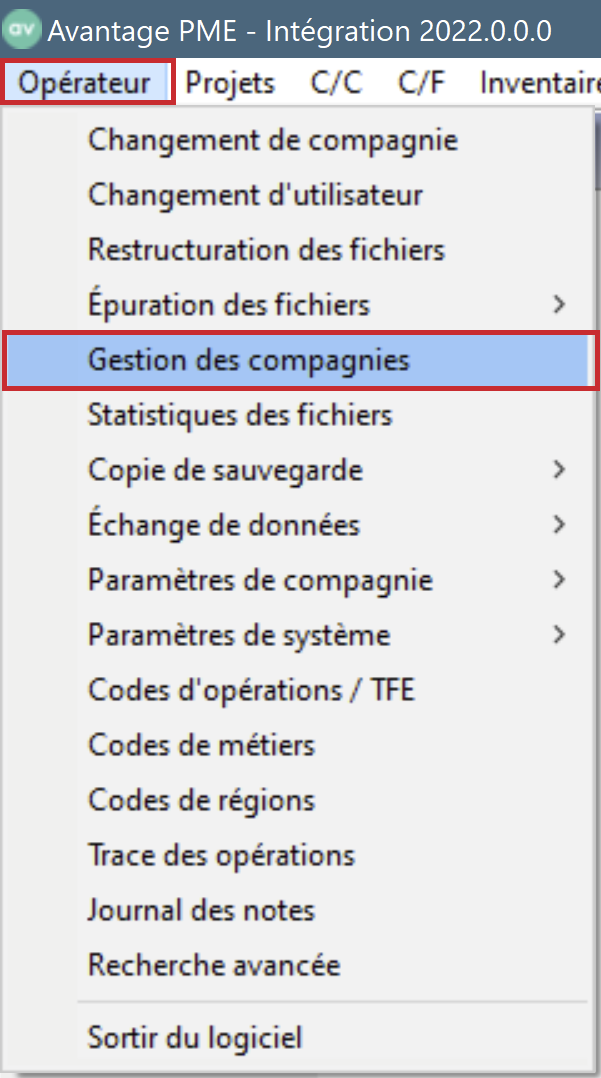
Then, in the Table tab, the number is displayed for each company.
-
Username and password
These fields must contain the username and password of the Avantage account that will be used to log in to Avantage.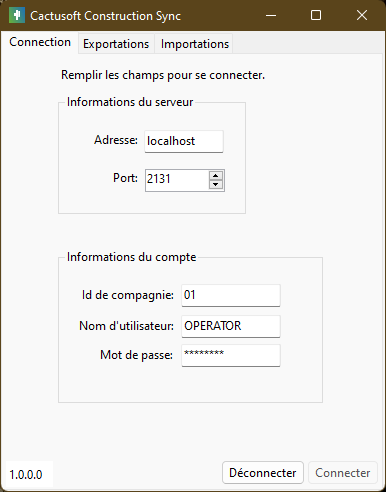
-
-
Click on the button
Connect.
If the connection is successful, the window will automatically change to the tabExports. -
The green dot confirms the connection. Leave open
-
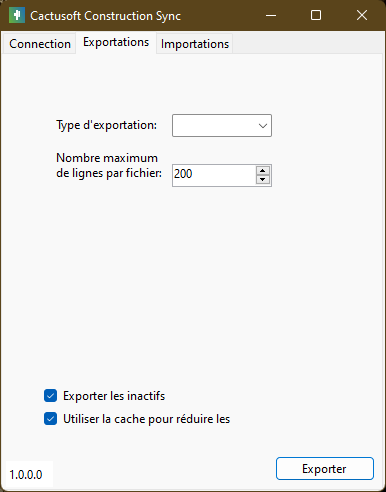
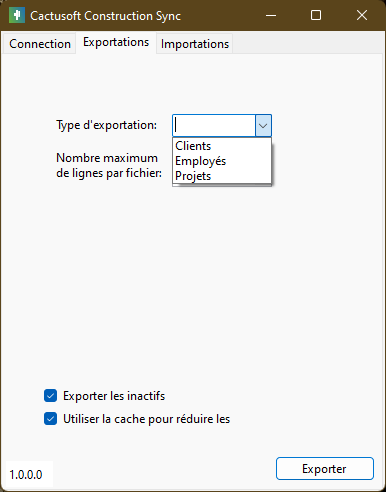
Using Elmer.Sync - Export
-
Choose data type
Click on the drop-down listExport typeand choose the desired option. -
There are two boxes to check or not at the bottom. We have the option to export the inactive ones and the Use cache option ensures that during the next export, the application will remember what has already been exported. So if the option is checked, only the new elements since the last export will be exported. If the export type causes the file to be too large, a maximum of 200 lines will be included in the csv file. For example, during a first export of projects, if there are 850 projects in total, there will then be 5 csv files in the export folder (4 of 200 and 1 of 50).
-
Click on the button
Export.
A window will appear to choose where the export file will be downloaded and what the file name will be. -
success

5- The use of the cache ensures that if no changes are present during a new export, this message will notify you
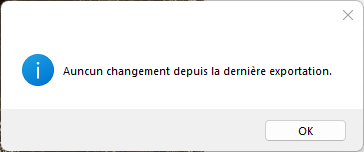
6- In summary, if we leave Use cache checked, the csv export files will be very small and will only contain the changes (new employee, new project or new client)
Using Elmer.Sync - Import
Import Employees
-
Following the export of employees, you must then import them into Cactusoft
-
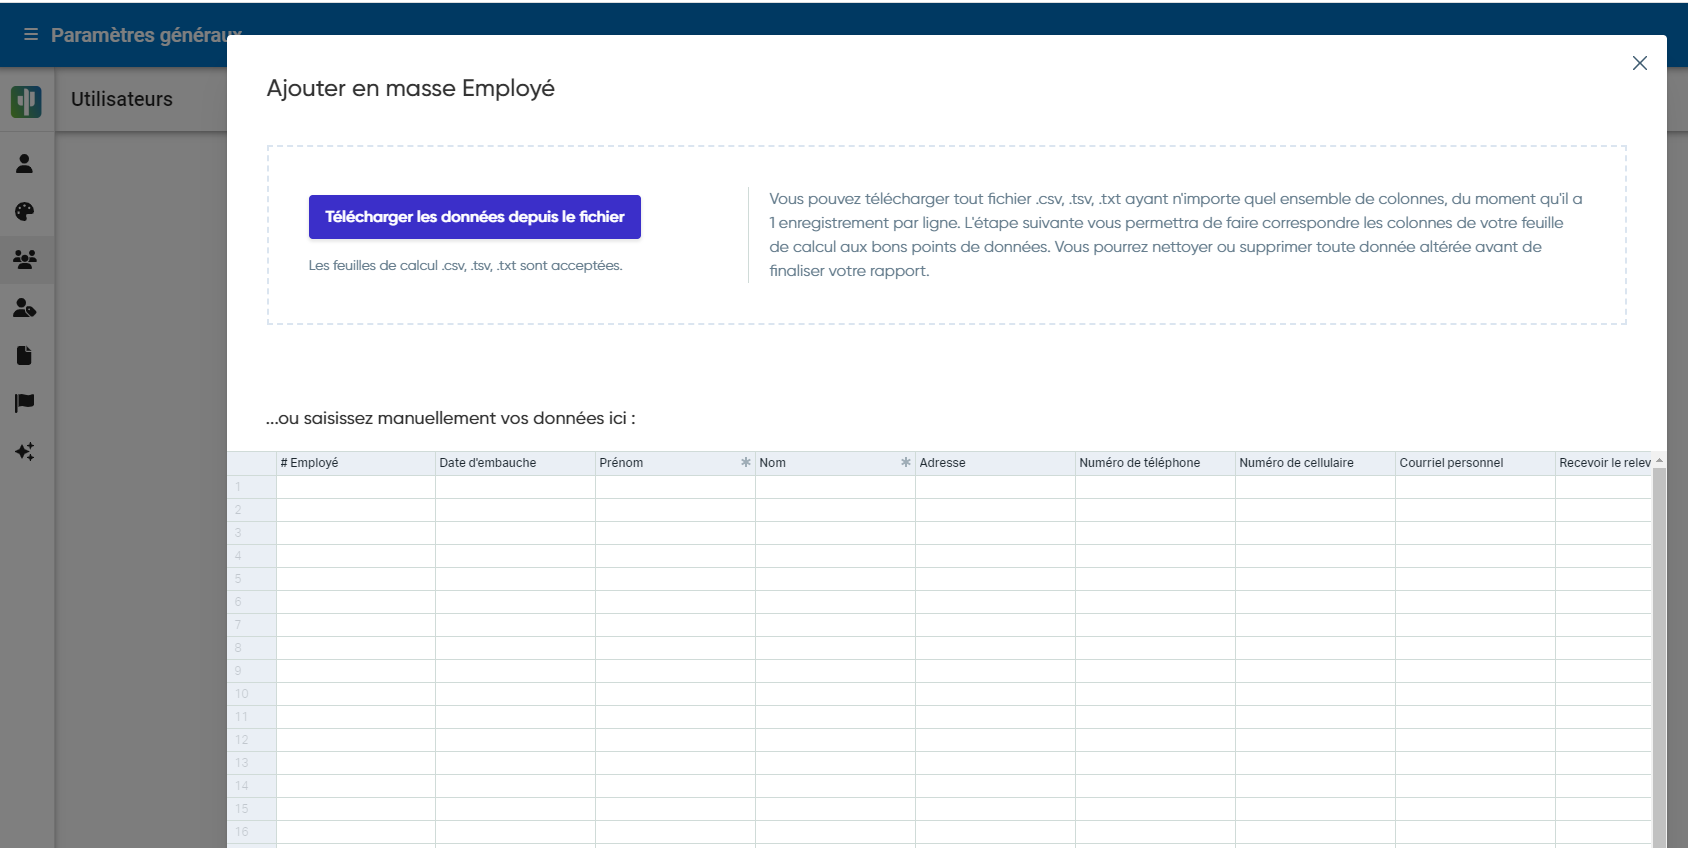
Go to General Settings, Users and click on the 3 small dots at the top right, choose Import
-
This action will create the employee, the user and even send the welcome email at the same time
-
Click on Download data from file
-
Go select the file exported in the previous step and double click on it
-
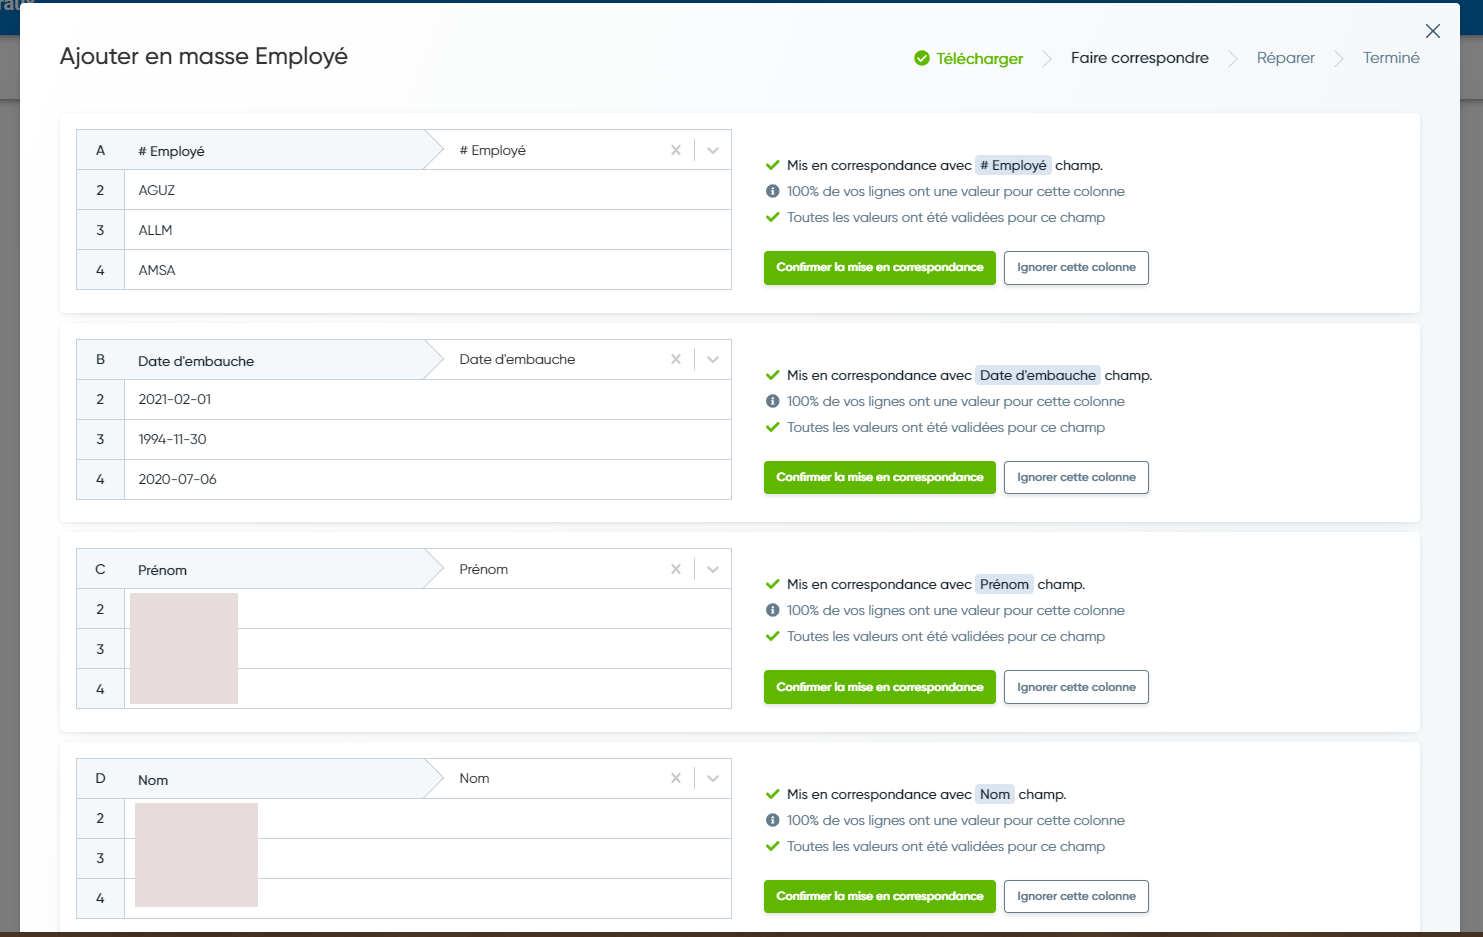
During the first employee import, a matching must be made, to ensure that the fields in the csv file are well categorized in Cactusoft
-
You must then Confirm the match or Ignore this column
-
Please note that the first import will be done with the help of Cactusoft support. To make sure you configure everything correctly. During the subsequent exports, the matching will already be done and you will only need to make checks and click on Examine
-
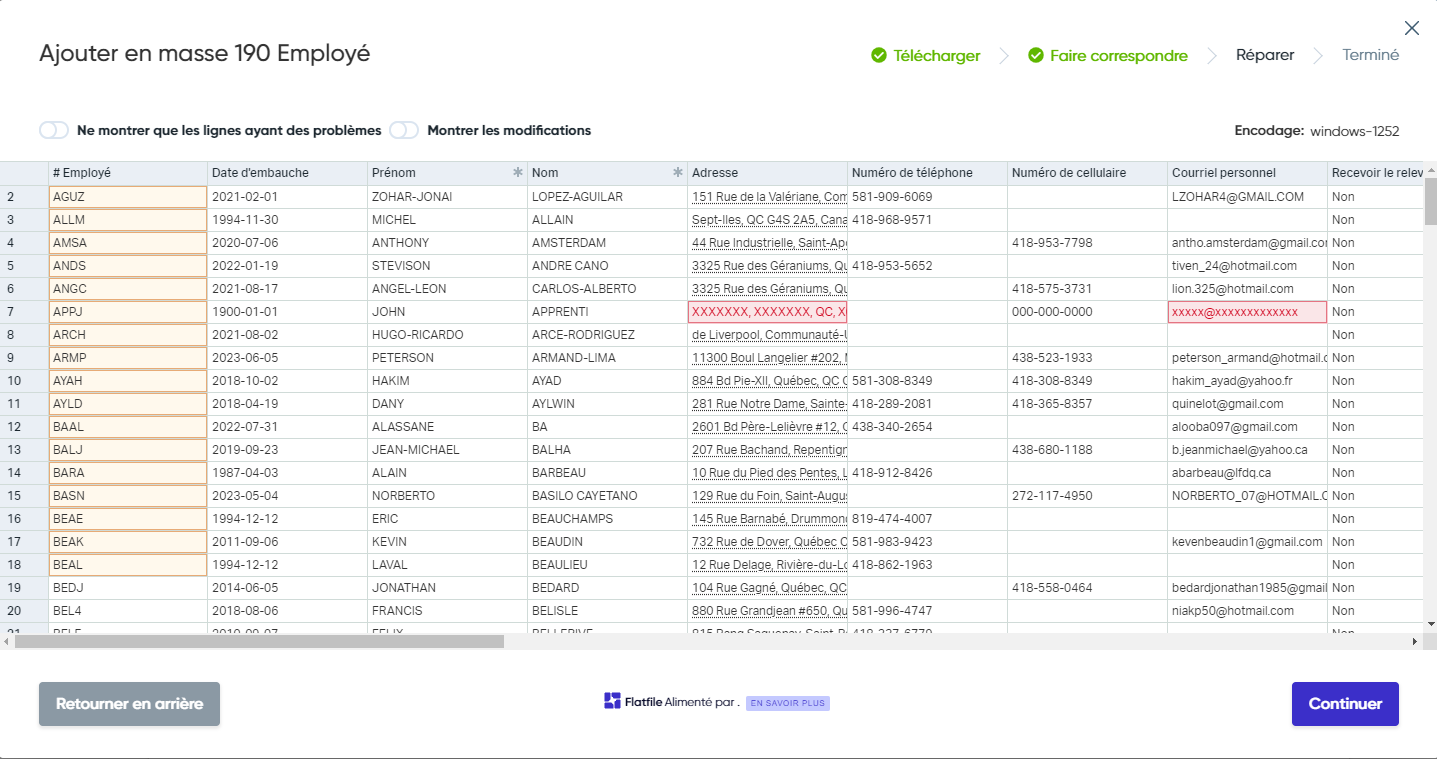
The Mass Add modal then opens, this is where you can make final adjustments
-
The yellow cells mean that the information is already present in Cactusoft and that this employee would then be updated
-
The red cells have problems, they may be invalid addresses according to Google Map, non-compliant email addresses, corrections must then be made.
-
When ready, click Continue and the employee import is complete.
Import Customers
-
Following the export of the clients, they must then be imported into Cactusoft
-
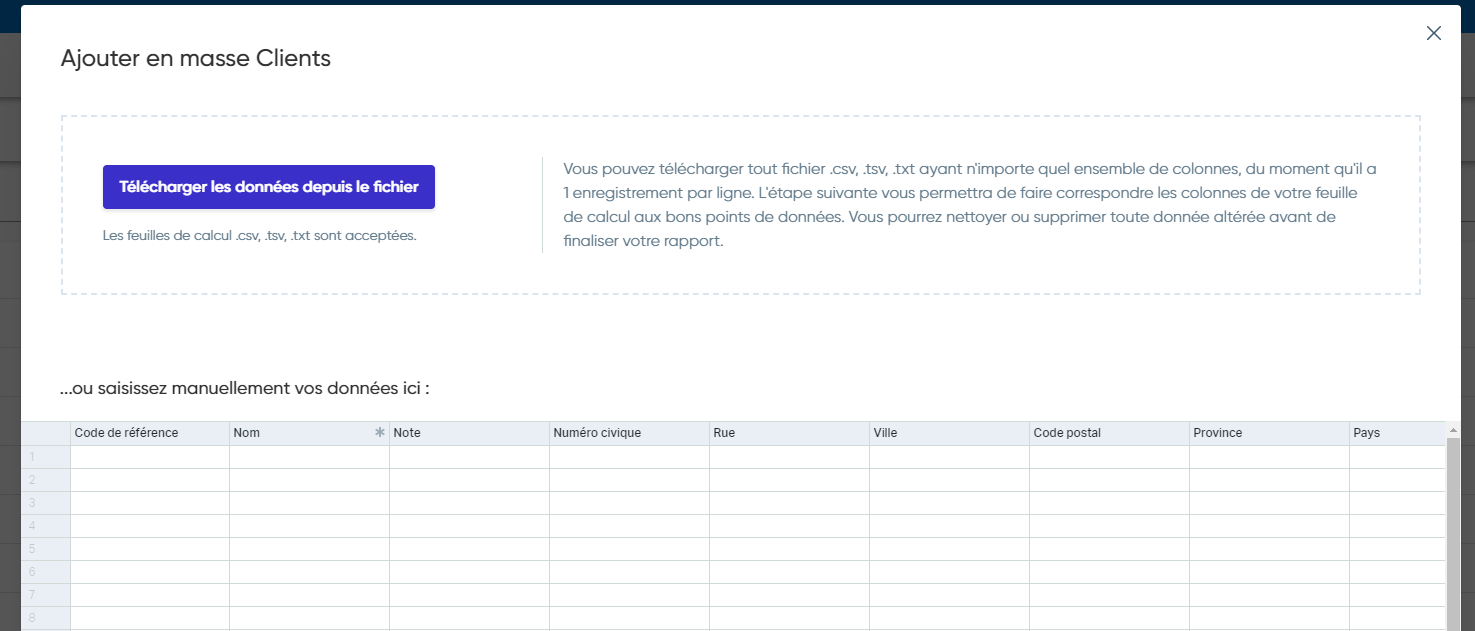
Go to Sales, Customers, click on the 3 small dots at the top right, choose Import
-
Click on Download data from file
-
Go select the file exported in the previous step and double click on it
-
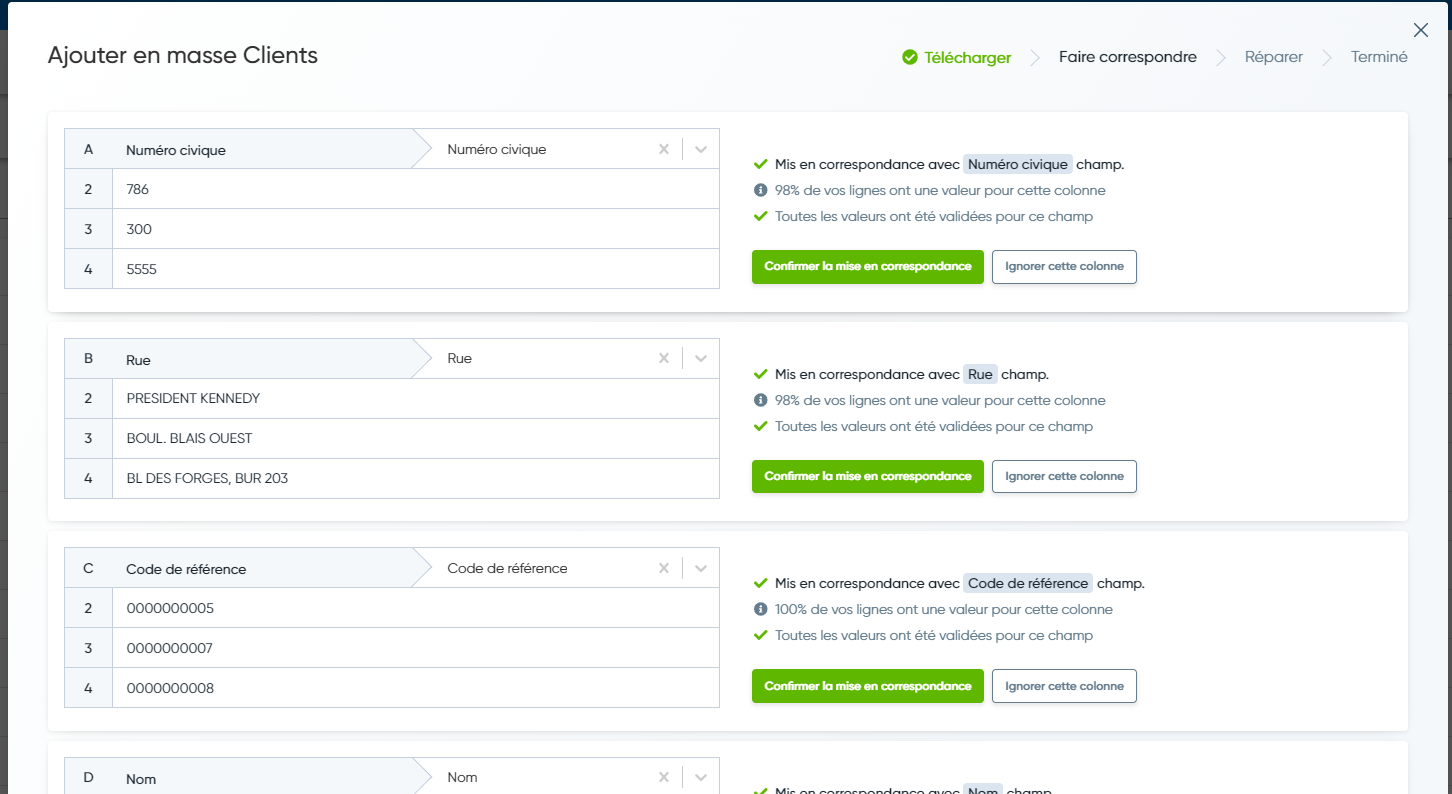
When importing clients for the first time, a matching must be done, to ensure that the fields in the csv file are well categorized in Cactusoft
-
You must then Confirm the match or Ignore this column
-
Please note that the first import will be done with the help of Cactusoft support. To make sure you configure everything correctly. During the subsequent exports, the matching will already be done and you will only need to make checks and click on Examine
-
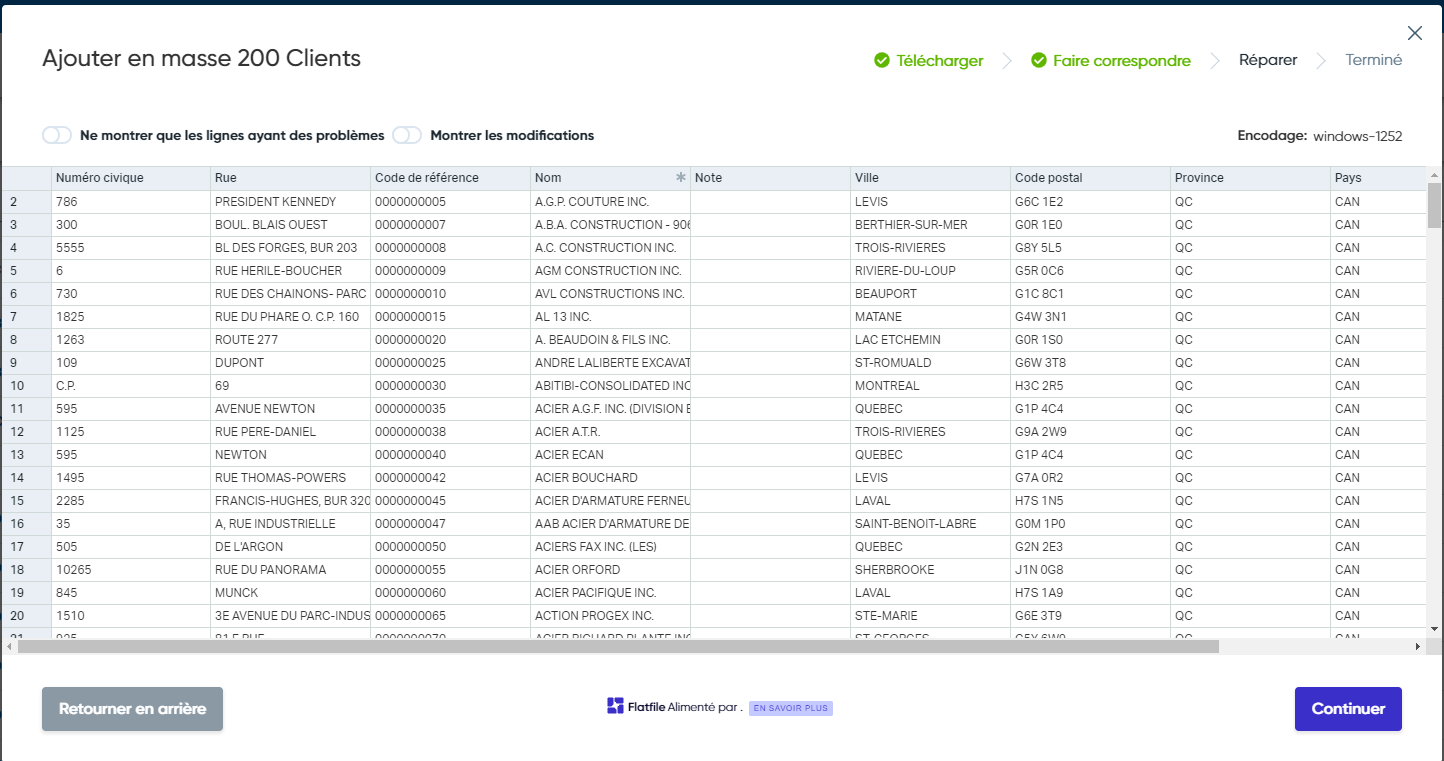
The Mass Add modal then opens, this is where you can make final adjustments
-
The yellow cells mean that the information is already present in Cactusoft and that this client would then be updated
-
The red cells have problems, so corrections must be made.
-
When ready click on Continue and the client import is completed
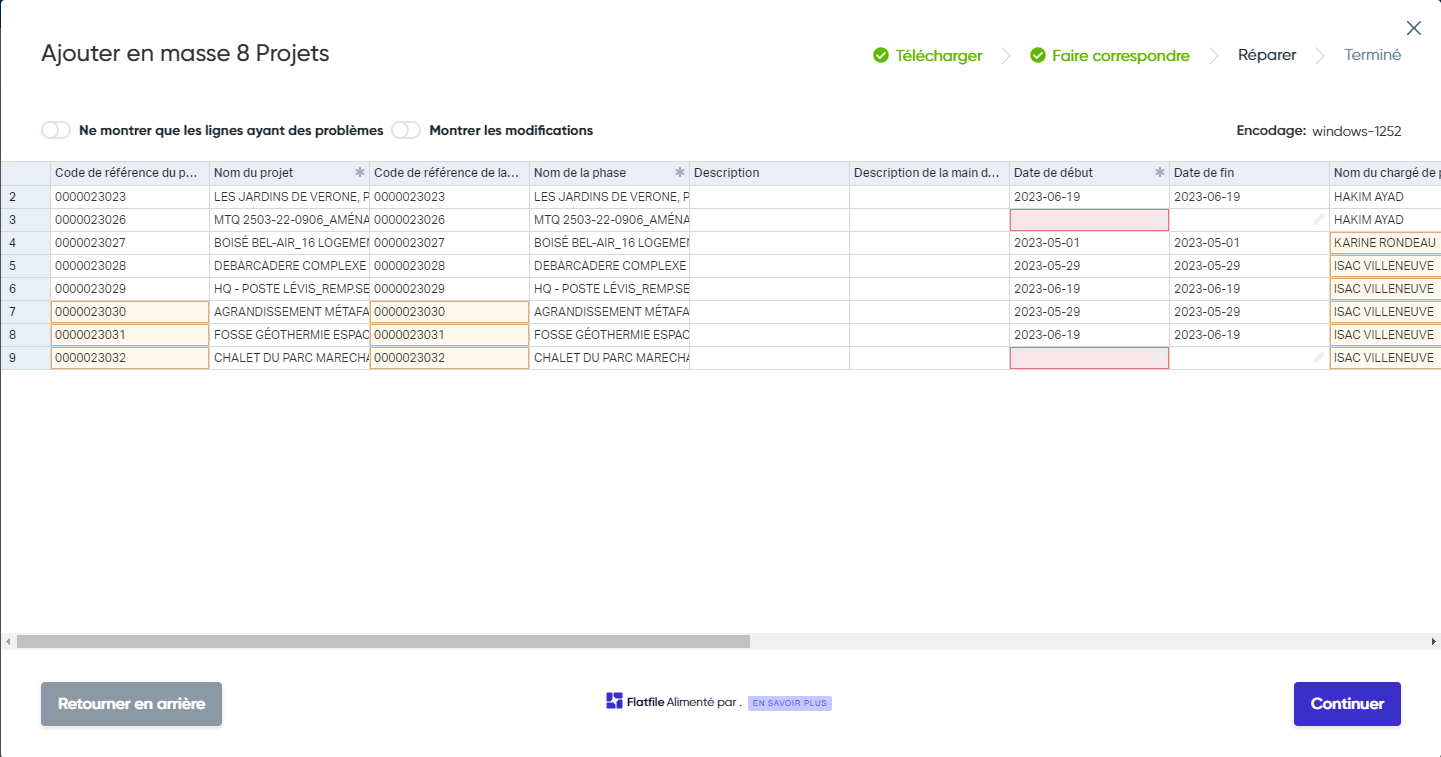
Imports Projects
-
Following the export of the projects, they must then be imported into Cactusoft
-
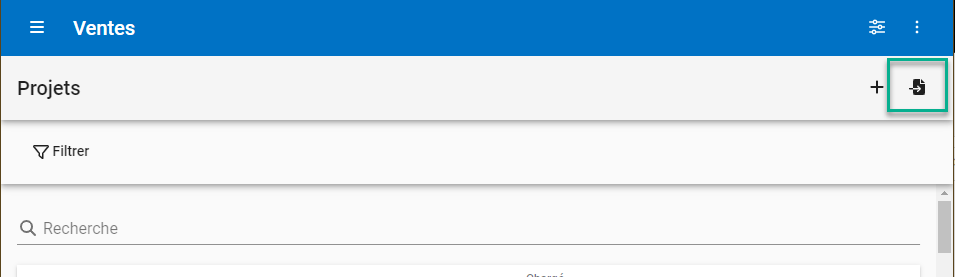
Go to Sales, Projects and click on the Import logo
-
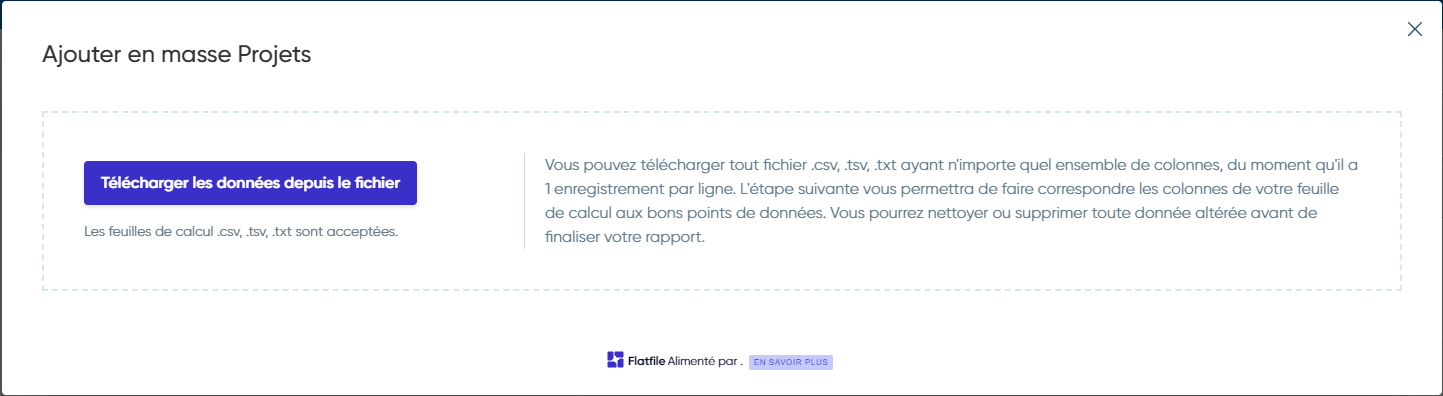
Click on Download data from file
-
Go select the file exported in the previous step and double click on it
-
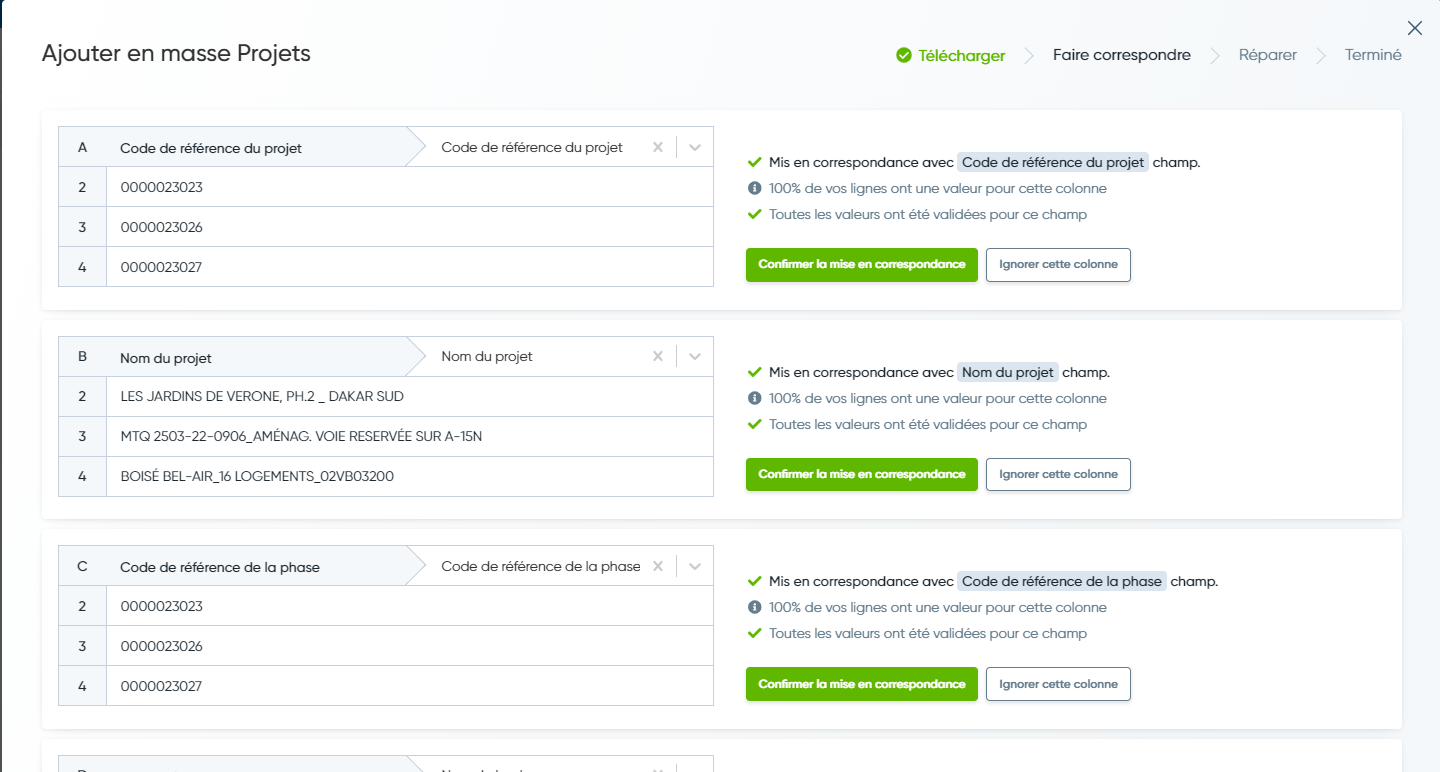
When importing projects for the first time, a mapping must be made, to ensure that the fields in the csv file are well categorized in Cactusoft
-
You must then Confirm the match or Ignore this column
-
Please note that the first import will be done with the help of Cactusoft support. To make sure you configure everything correctly. During the subsequent exports, the matching will already be done and you will only need to make checks and click on Examine
-
The Mass Add modal then opens, this is where you can make final adjustments
-
The yellow cells mean that the information is already present in Cactusoft and that this project would then be updated
-
The red cells have problems, they may be invalid addresses according to Google Map, unfilled fields, corrections must then be made.
-
When ready click on Continue and the import of the projects is completed